Overview
Destiny 2, the second entry in the Destiny saga by acclaimed AAA studio, Bungie, launched without features that players had become accustomed to in the original release. From the dual-primary weapon system to the simplified subclass trees, customization opportunities were reduced and simplified, leaving gamers like myself feeling reduced and simplified, too. Destiny 1 provided seemingly endless gear, garb, and exotics to allow players to build unique character builds. Why take that freedom away in the sequel?
Because Bungie is deeply in tune with its community, the studio pivoted from this simplified version of the game and gradually started to reintroduce some of the features that made the initial game so good. Features such as Armor 2.0 with mods and weapons that were not locked to the primary or secondary slot started to create a huge build-crafting community.
All these additional ways to add power to my guardian left me wondering, when would D2 get a loadout system to manage all this newfound power? As a UI designer and Destiny fan, I wanted to see what I could come up with. After 2 years of noodling and a deadline brought on by Bungie announcing an official loadout system launching with the Lightfall expansion, here’s what I’ve come up with.
Job roles: Wireframes, High-Fidelity mockups
Timing: Way too long
Tools: Xd, Illustrator, Photoshop
ANALYZE
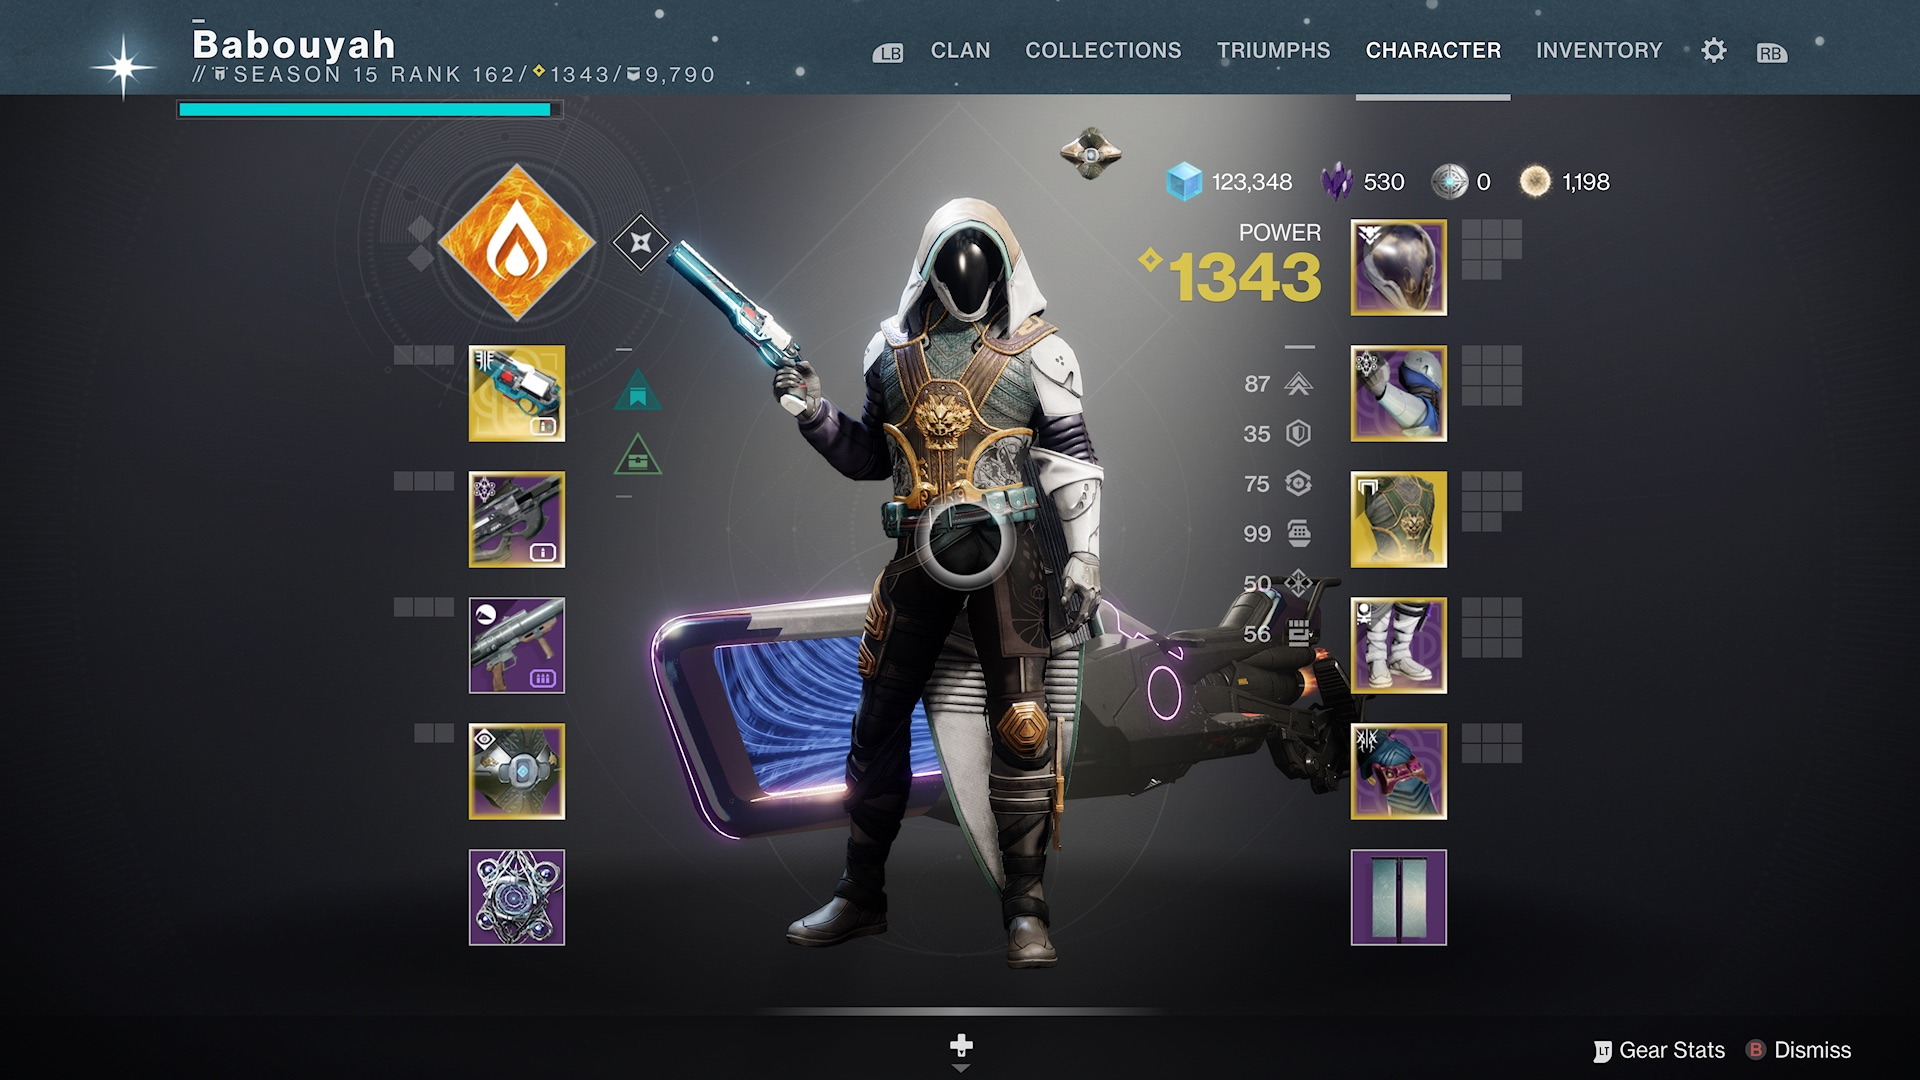
The character screen
I chose the character screen as my starting point. In Destiny, this is where you can modify everything from the way you wield the light (or dark), the ornaments to make your cloak look a bit more wolfy, and the specific mods placed on your weapons and armor to make them perform better in certain areas. Mods can also improve your character’s intrinsic abilities. For instance, if you wanted the ability to dodge more as a hunter, you would equip more mobility mods to your armor pieces until you achieved the level that you were looking for.
This function manages guardian stats, important info the player needs to determine if they can perform in-game actions the way they want. I wanted to use this existing system for crafting an in-game loadout feature with a storytelling approach to how a loadout fits into the lore of Destiny 2.
LORE
The Guardian’s best friend, The Ghost
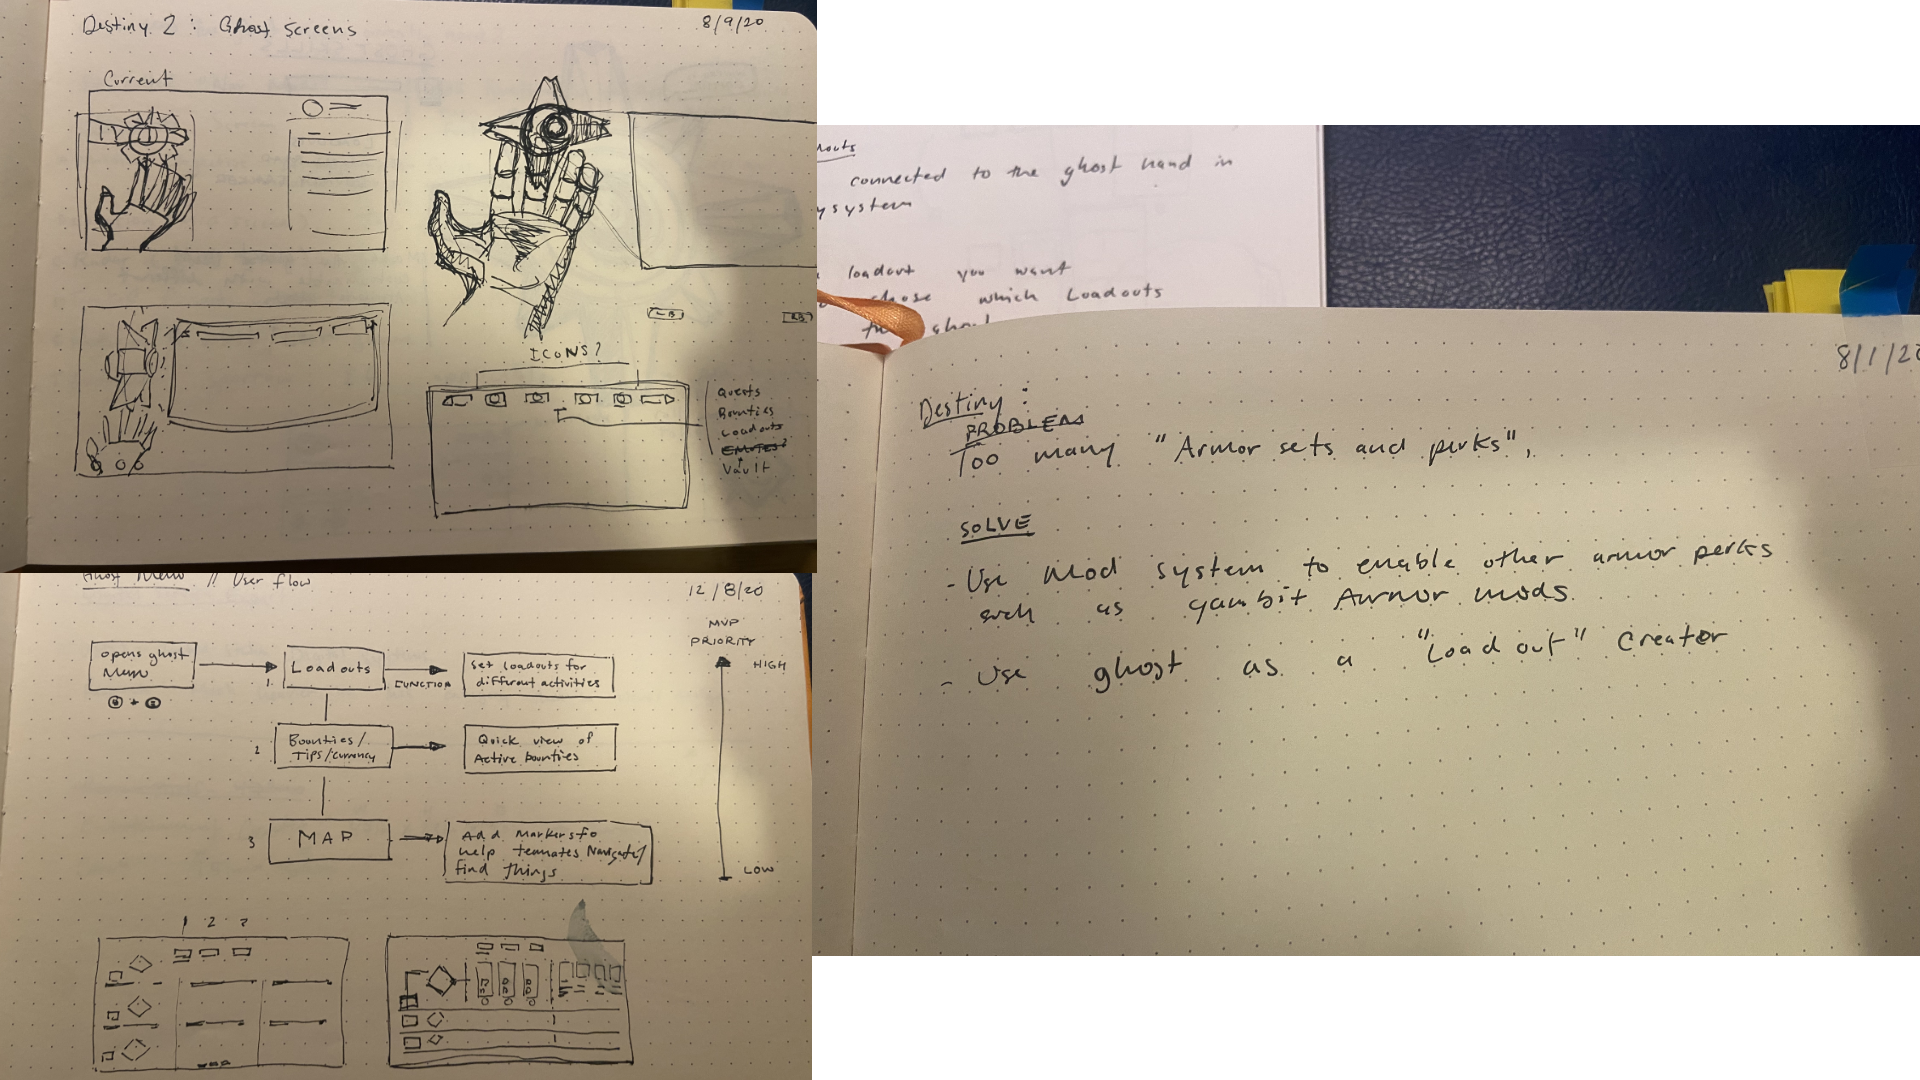
The Ghost is the Guardian’s biggest ally. It picks the Guardian up when they fall (out of the tower), helps the Guardian hack into control consoles, provides waypoints to the next fight, and could hold the Guardian’s guns, armor, and Gjallardoodles and equip them for that next fight. From the early stages of thinking through this idea, I thought this made sense, and the Ghost would even be able to remember and recommend the most effective loadouts for your Guardian’s combat style.
I have dubbed this concept the “Ghost loadout system”. There are three main components to this system: customizing a loadout in the character screen, the ability to apply, set, save, and reconfigure loadouts within the character screen, and lastly, the ability to access some of these loadouts on the go, via your Ghost. Let’s jump in.
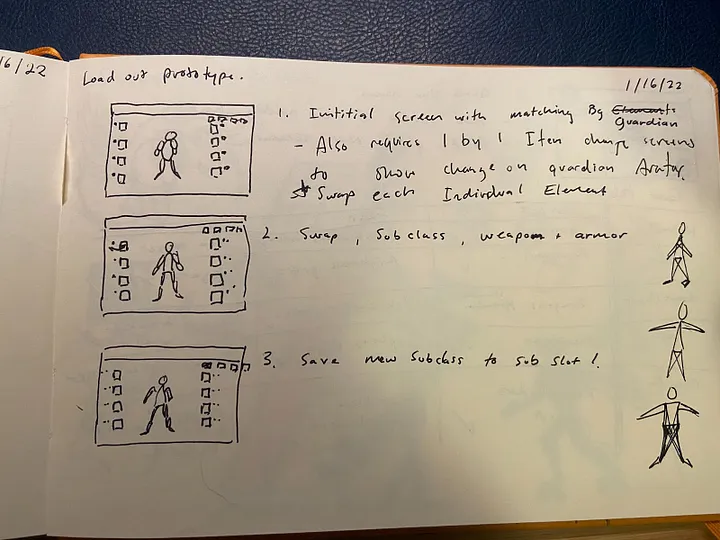
Initial sketches
IMPLEMENT
The Ghost Pack
Using the character menu, players were already customizing loadouts but didn’t have a place to store them in-game. Games such as Halo 4 and Call of Duty: Modern Warfare 2 had loadout (class) systems, but placed them in the sub-nav menu. I wanted to make sure the loadout system was accessible in the character menu. Players were also using third-party apps like DIM (Destiny Item Manager), braytech and Little Light to manage their inventory and loadouts. The issue with these applications is that while highly functional, required the player to sign in to an external website to use the service. This became a barrier of entry for players who were not as into build crafting and thus, were not able to tailor their Guardian to their unique playstyle as well as Guardians using these applications. The G/Pack was an attempt to solve this problem.
G/pack placement
Trying to maintain the structure of the character menu, I wanted the G/pack to slot in seamlessly to the player experience.
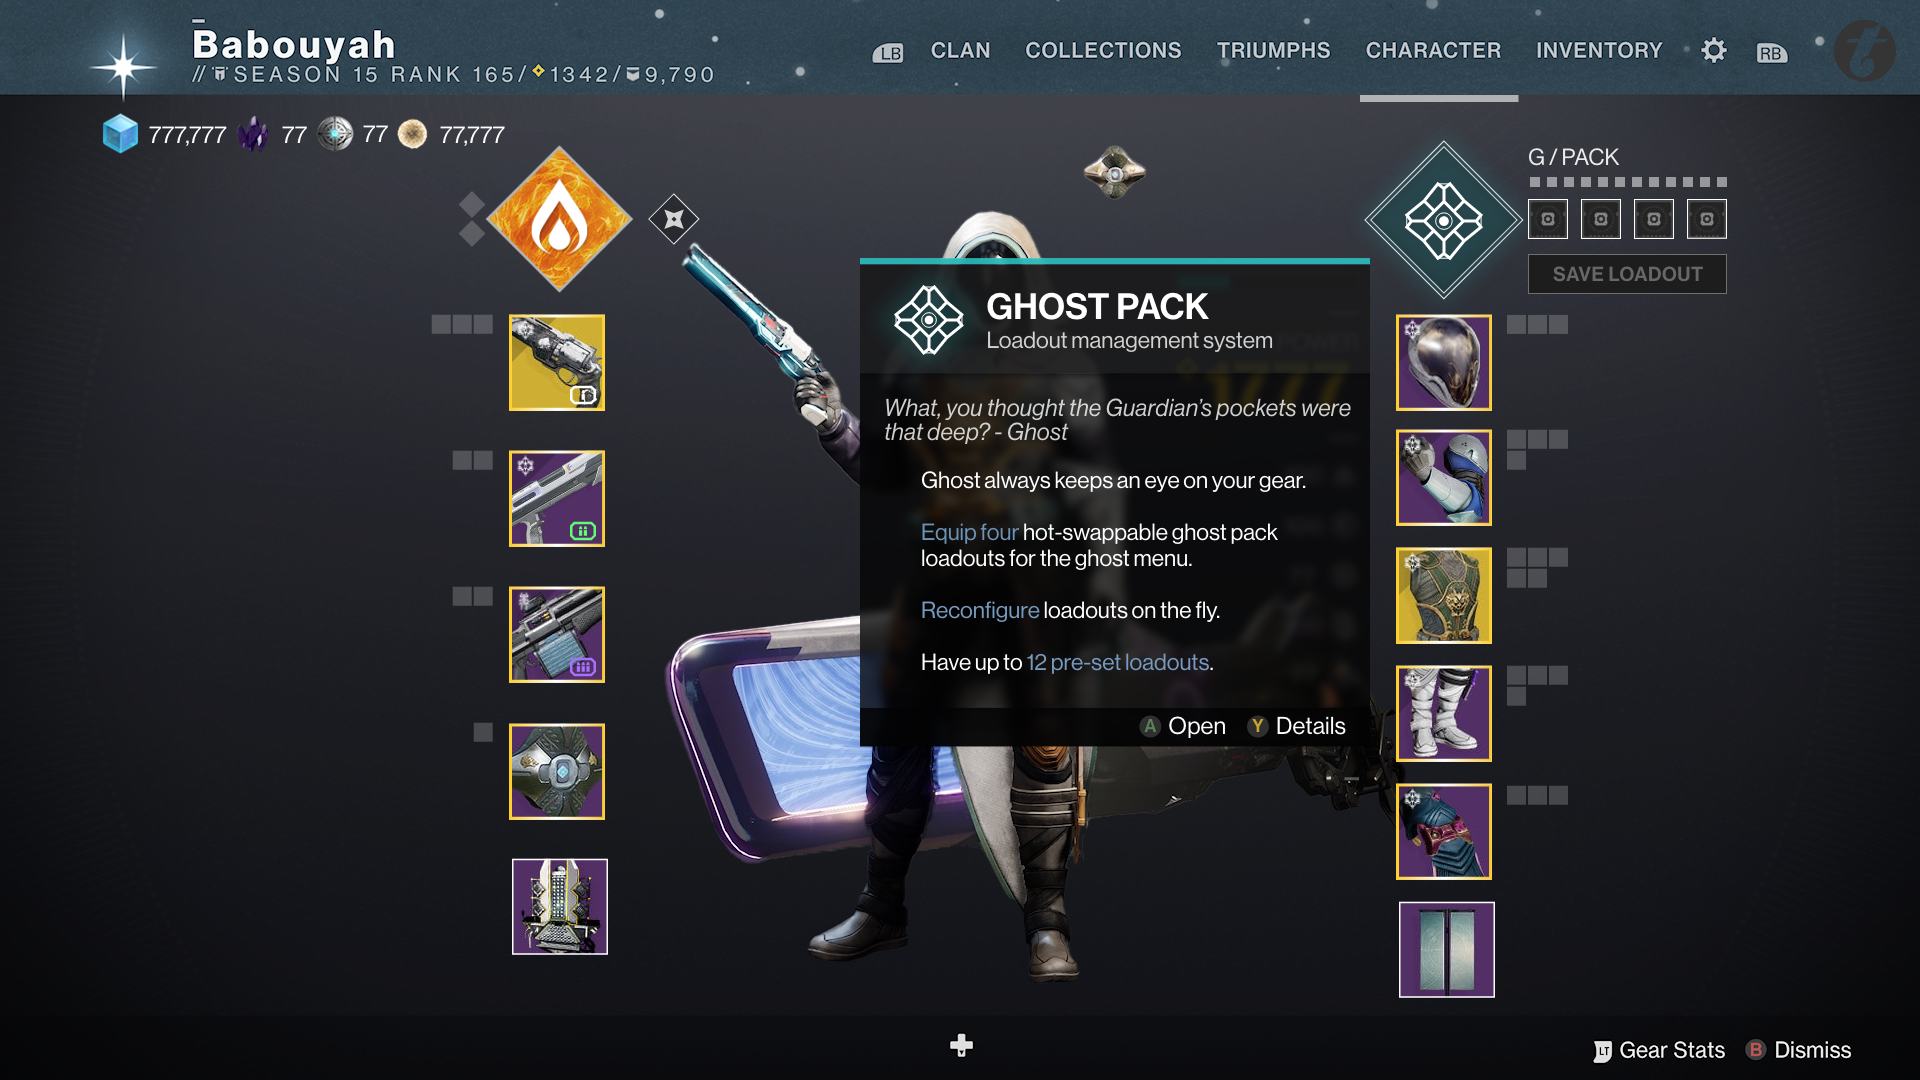
G/pack placement, high fidelity
Out of the way, but placed where players would focus their efforts on customizing their armor stats and mods. I also focused on matching the visual style of the game.
INTERACTION
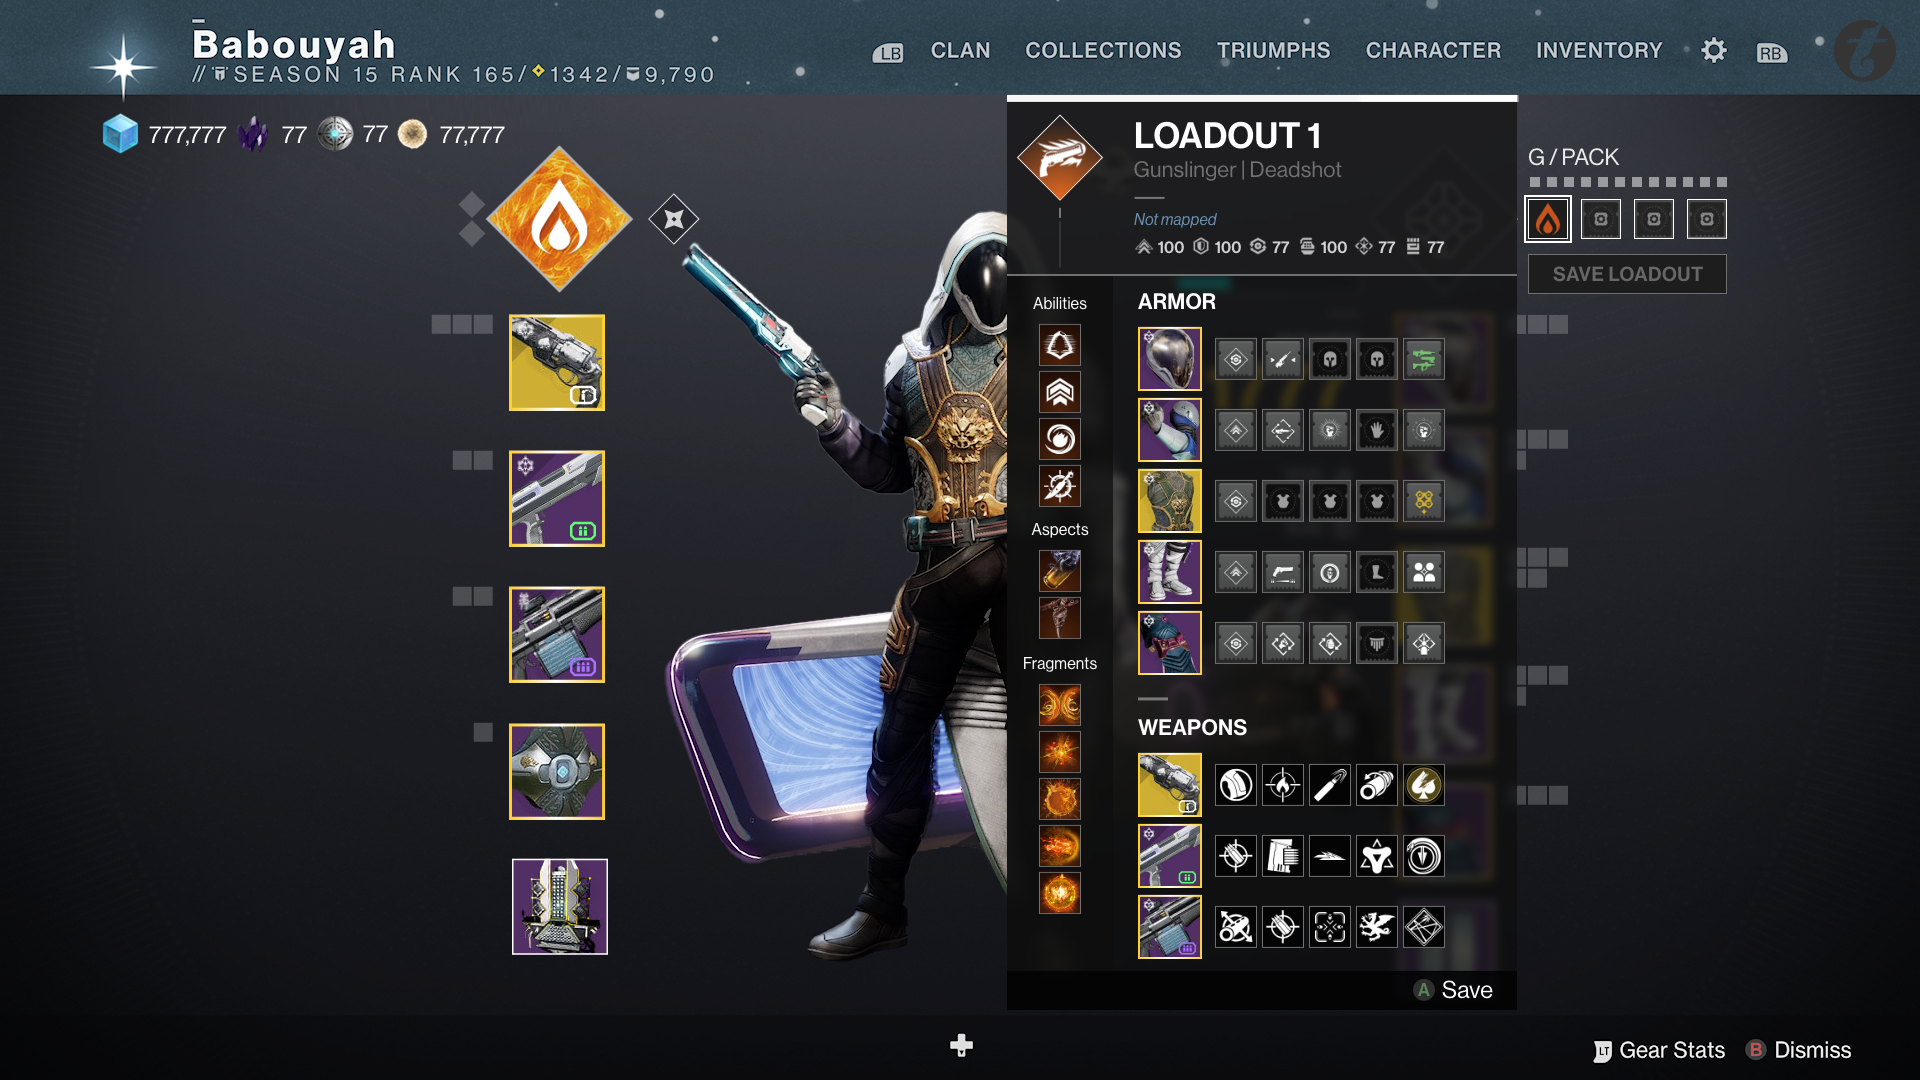
Three ways to loadout
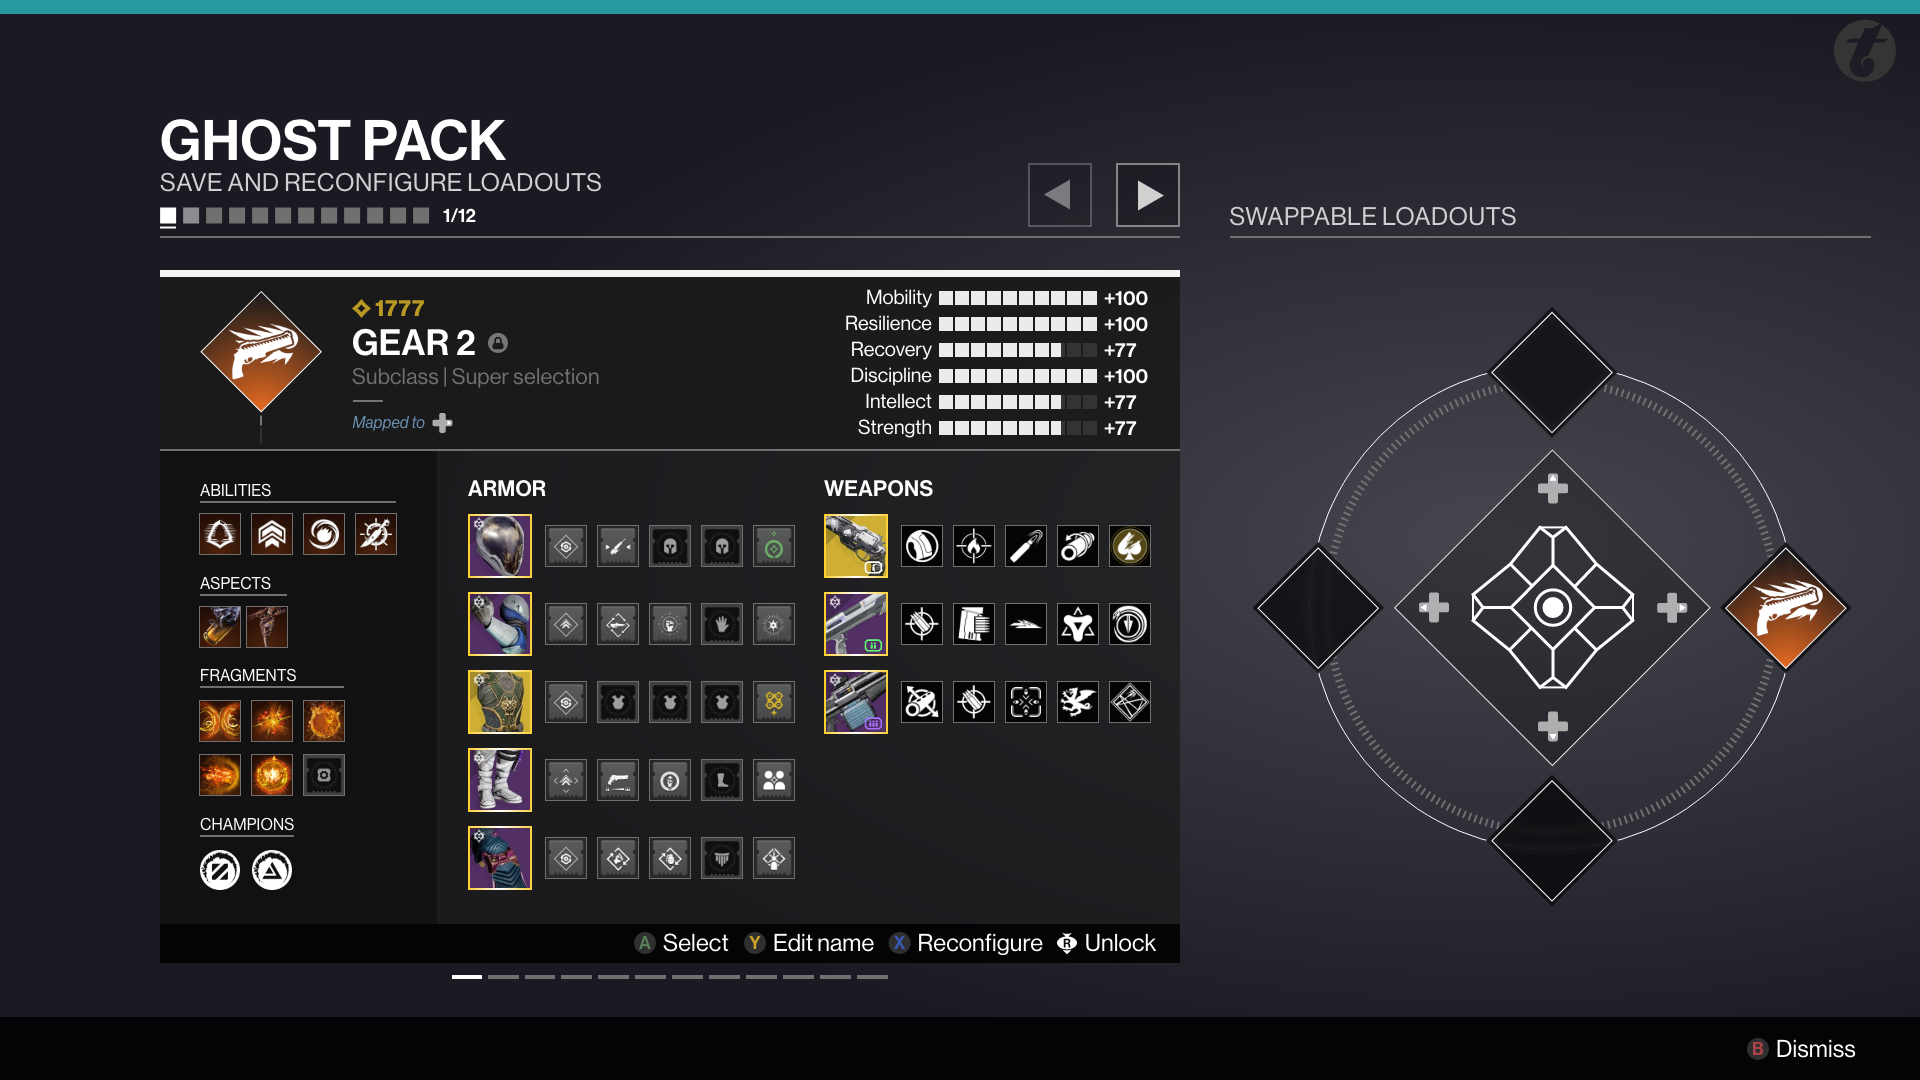
The G/Pack is where players save their loadouts for in-game use. There are two ways to do this. The first way is from the character menu. From the image, you can see there are four “swappable slots” located below the G/Pack heading. These slots allow players to quickly save what they have equipped on their Guardian. Once saved, players will also have the ability to reconfigure or lock these loadouts for future use. Once set to one of these four slots, players will be able to quickly equip the loadout from the character screen.
Save directly to the G/pack
Selecting a swappable slot allows players to save what they have equipped to their character quickly. Players can also overwrite these slots as needed.

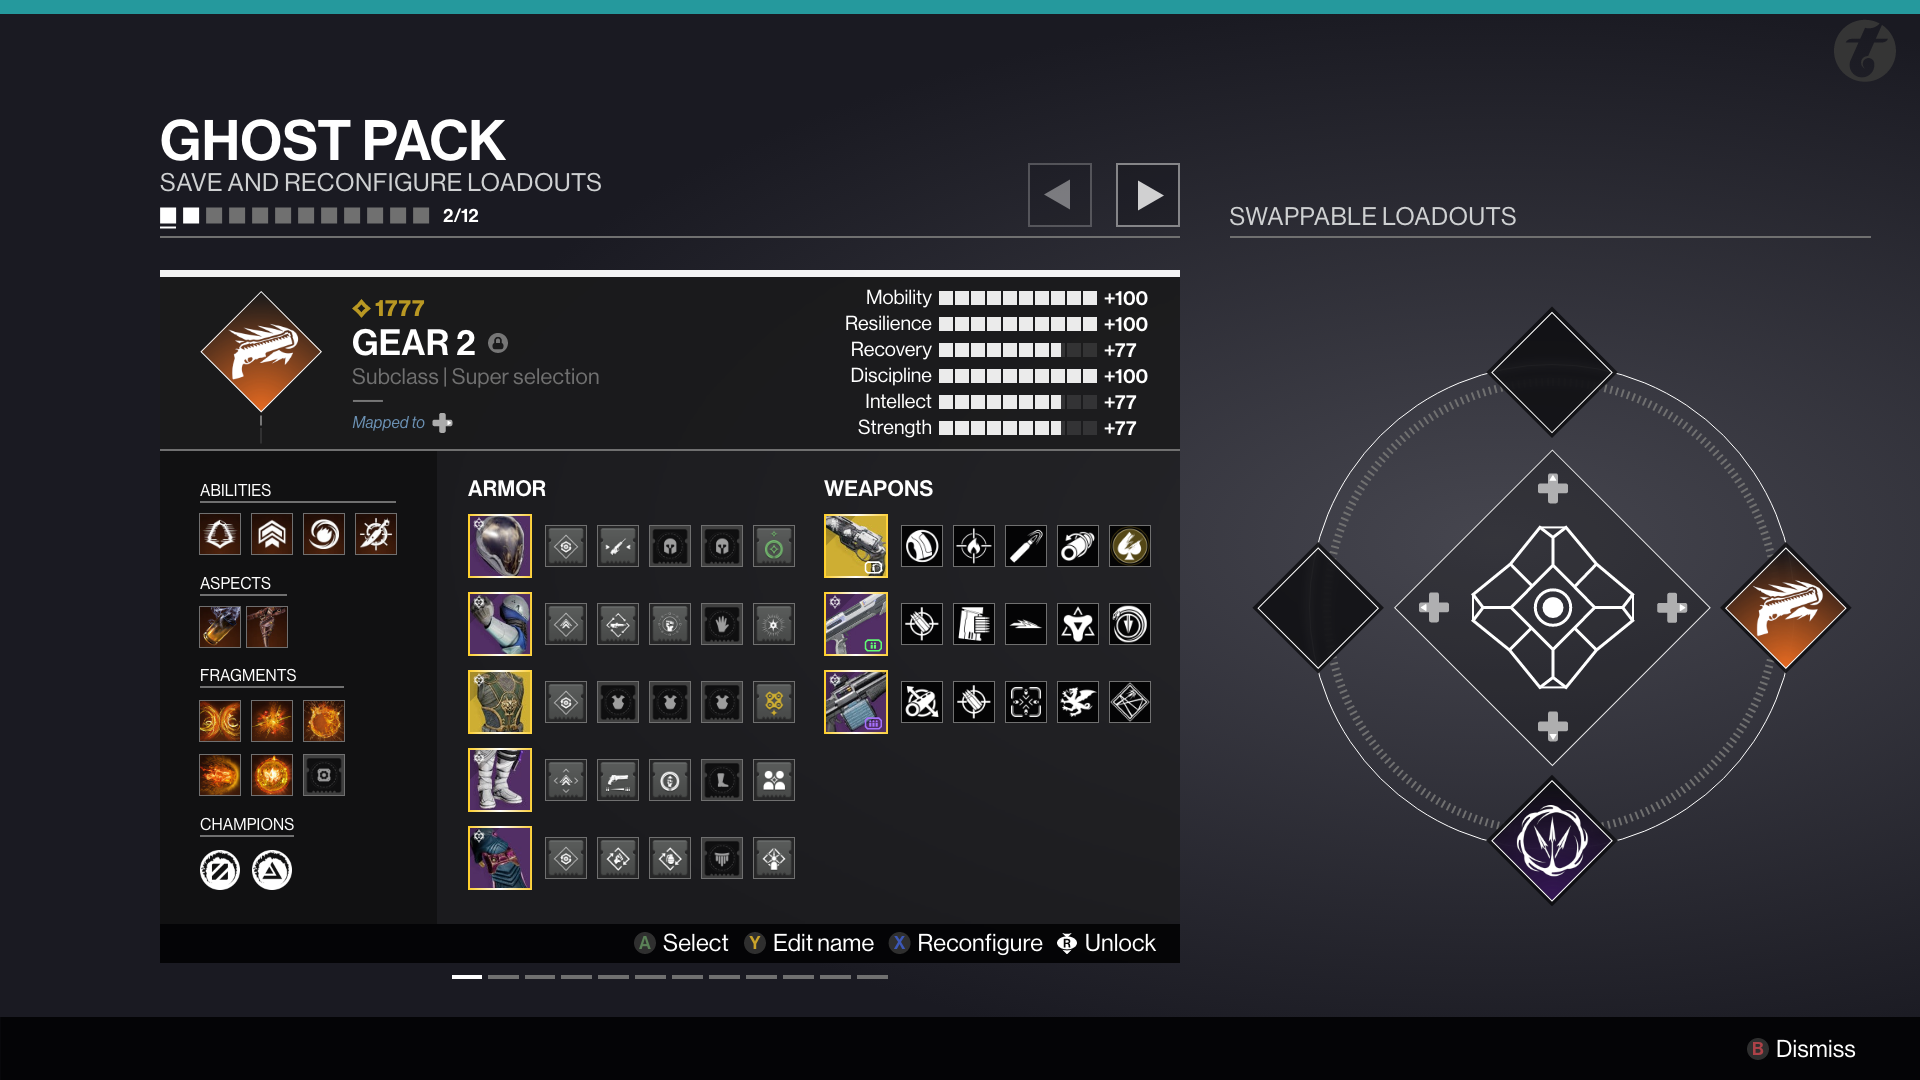
Equipped state
You can see that in slot one of the G/pack, a solar sub-class is equipped. Using a G/pack slot takes up 1/12 potential loadout slots.
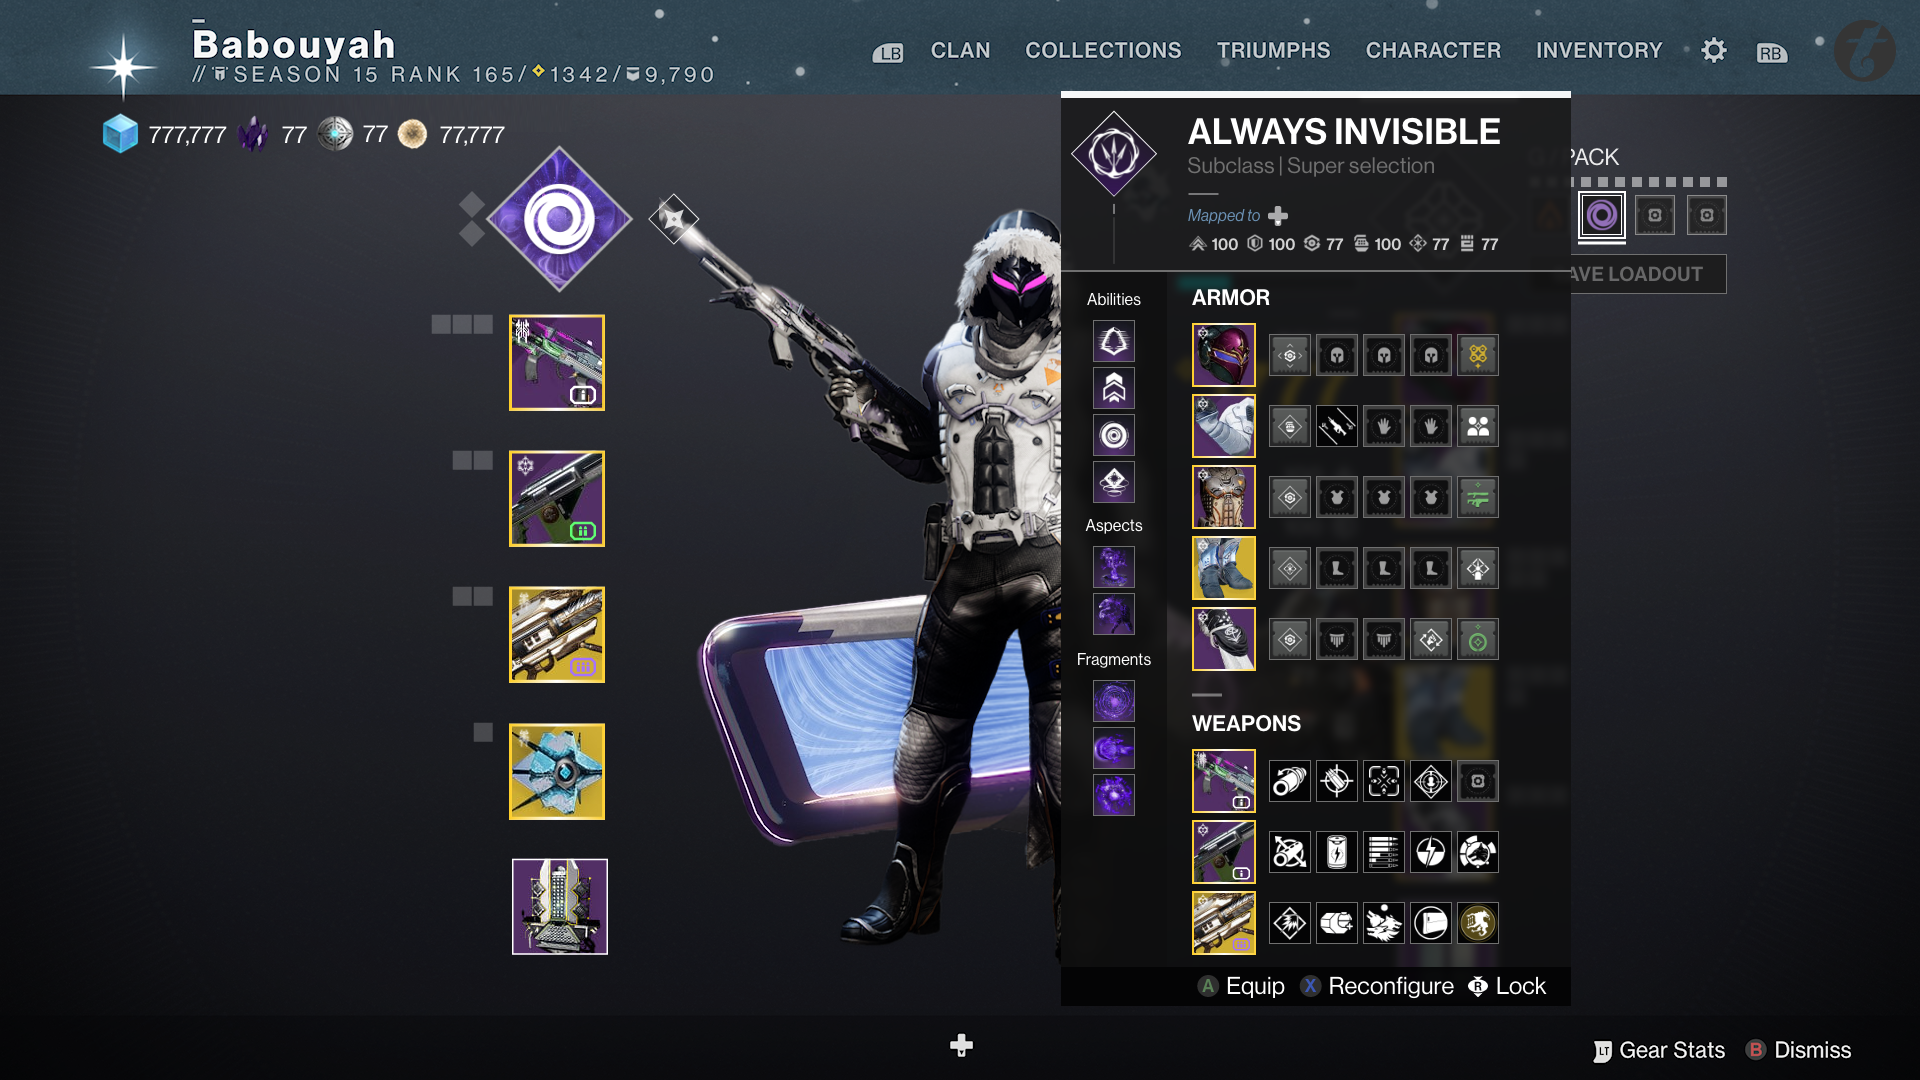
The second way is to use the “Save Loadouts” button. This allows players to save what is currently mapped to their Guardian and places it in one of the open slots within the G/Pack (12 total), but not one of the four key bound slots (which you can change later).

Saving...
By saving a loadout, the player is bypassing the G/pack slots. The G/pack almost acts as a "favoriting" system for player's top loadouts. Saving a loadout lets players revisit a potential loadout at a later time.
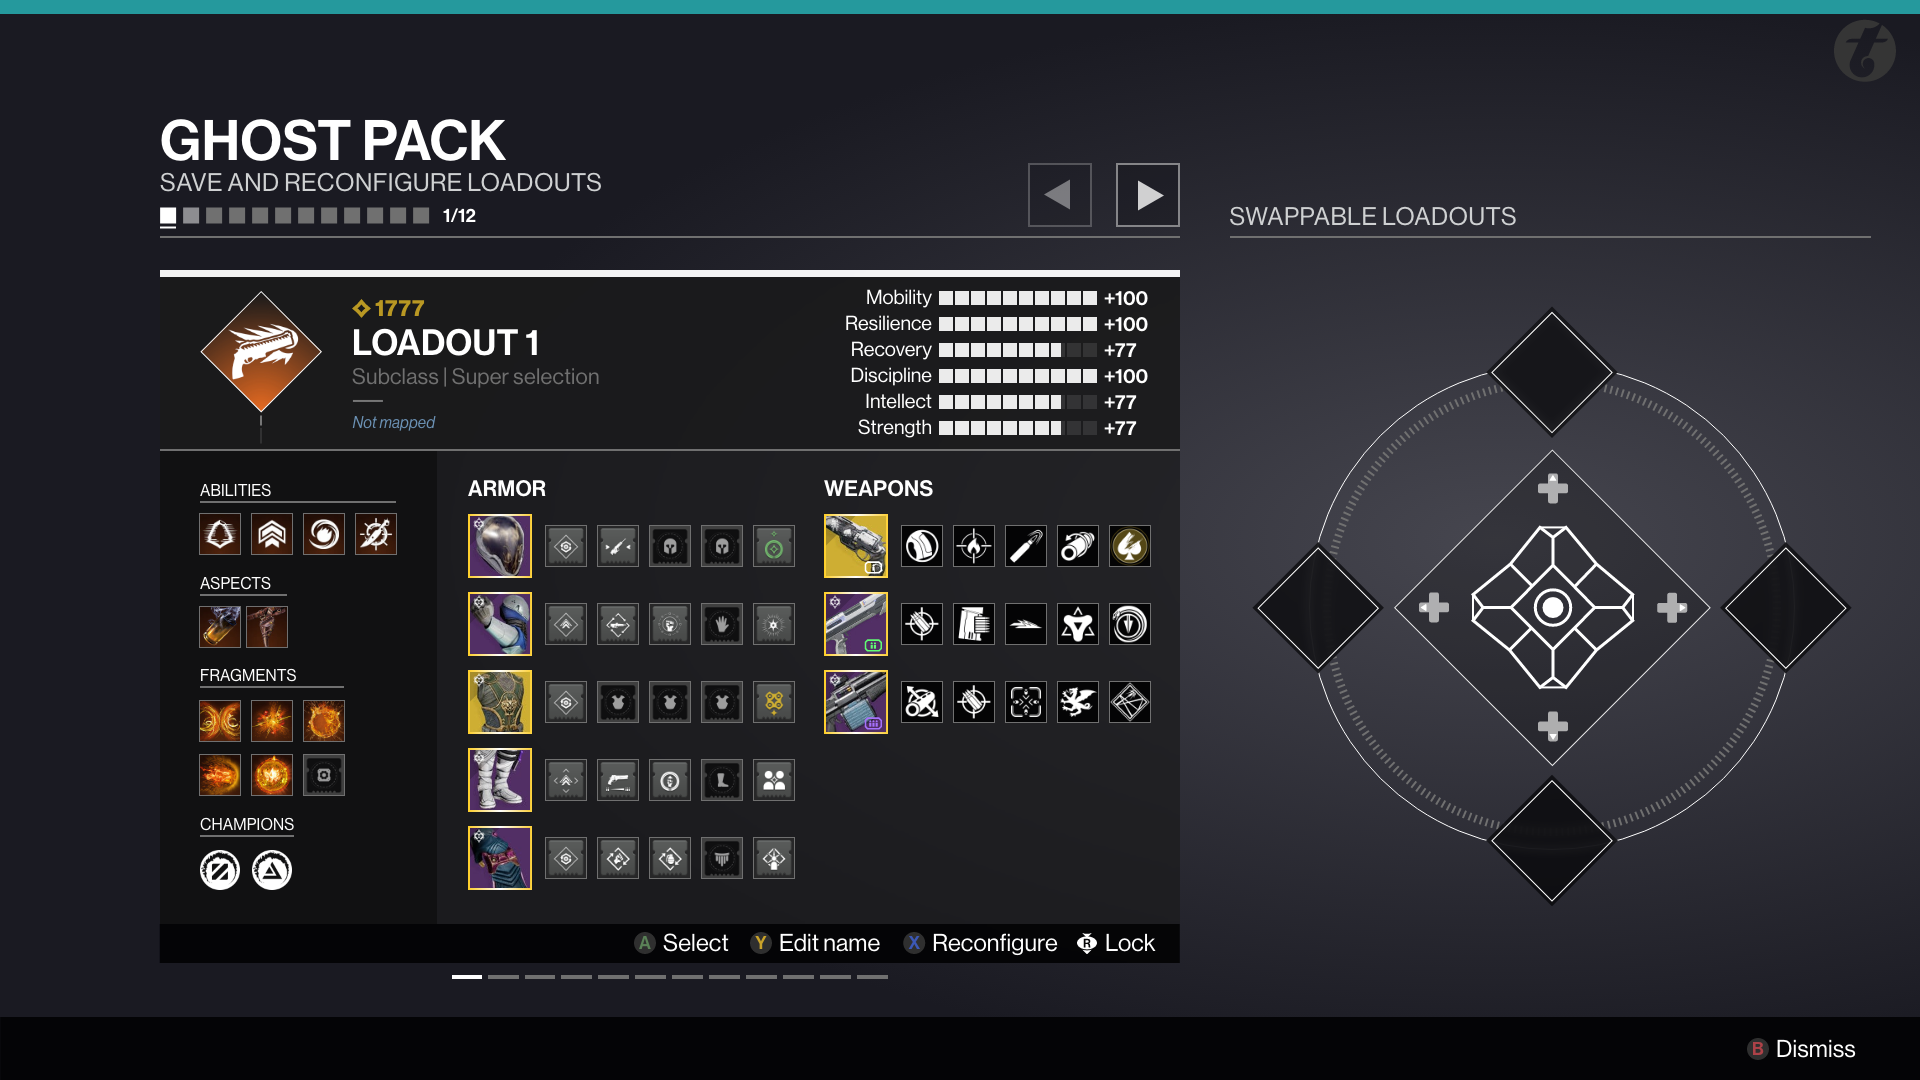
Ghost pack menu
The Ghost Pack menu is where players can save loadouts, but also where players can map their favorite loadouts to the G/pack on the character screen.
Once a player has saved a loadout into the G/Pack by either using a swappable slot or the save button, they will be able to edit the name of the loadout, select and apply it to one of the four available slots, mapped to the four directional pad buttons, or reconfigure the loadout to open up additional space in the G/Pack for other loadout options.
Customize
Destiny players love to play the game as much as they like to make the game their own. Offering the ability to name each loadout gives players a sense of ownership over their individual Guardian.
ENHANCEMENT
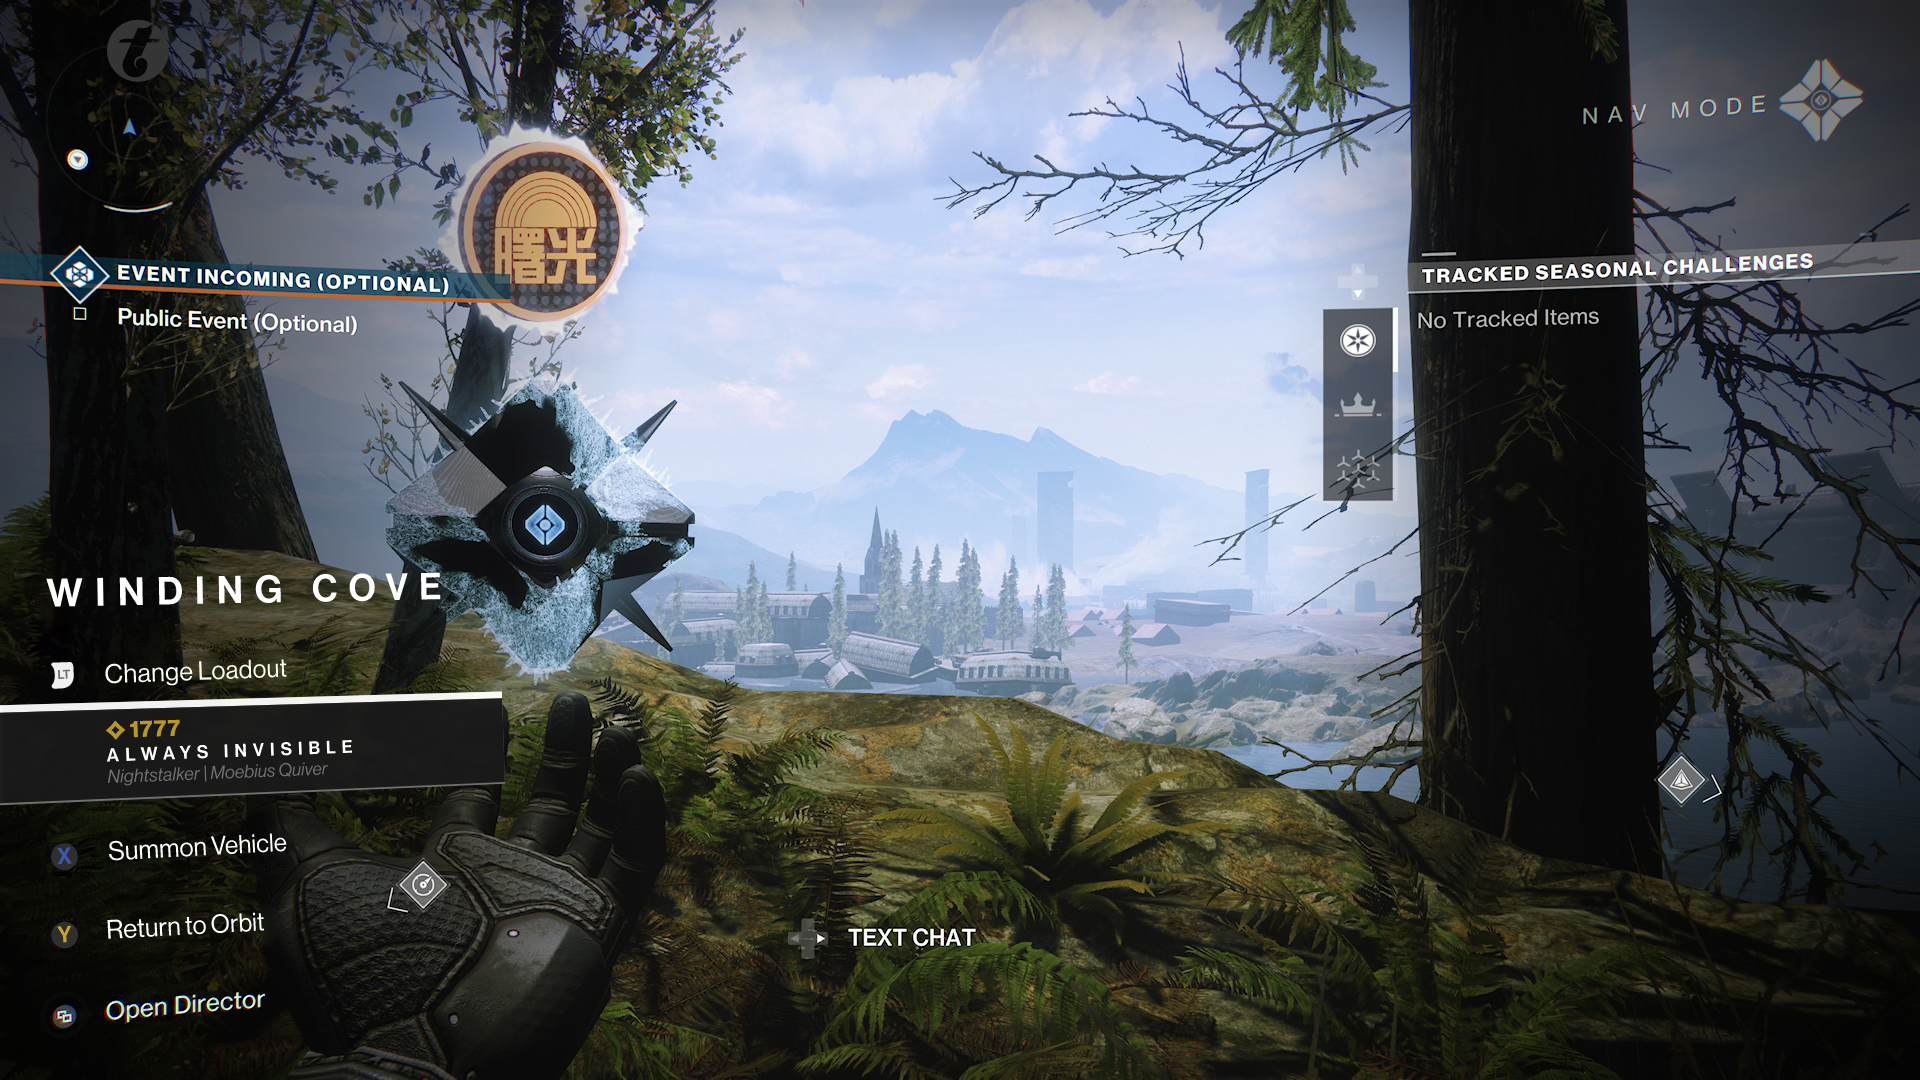
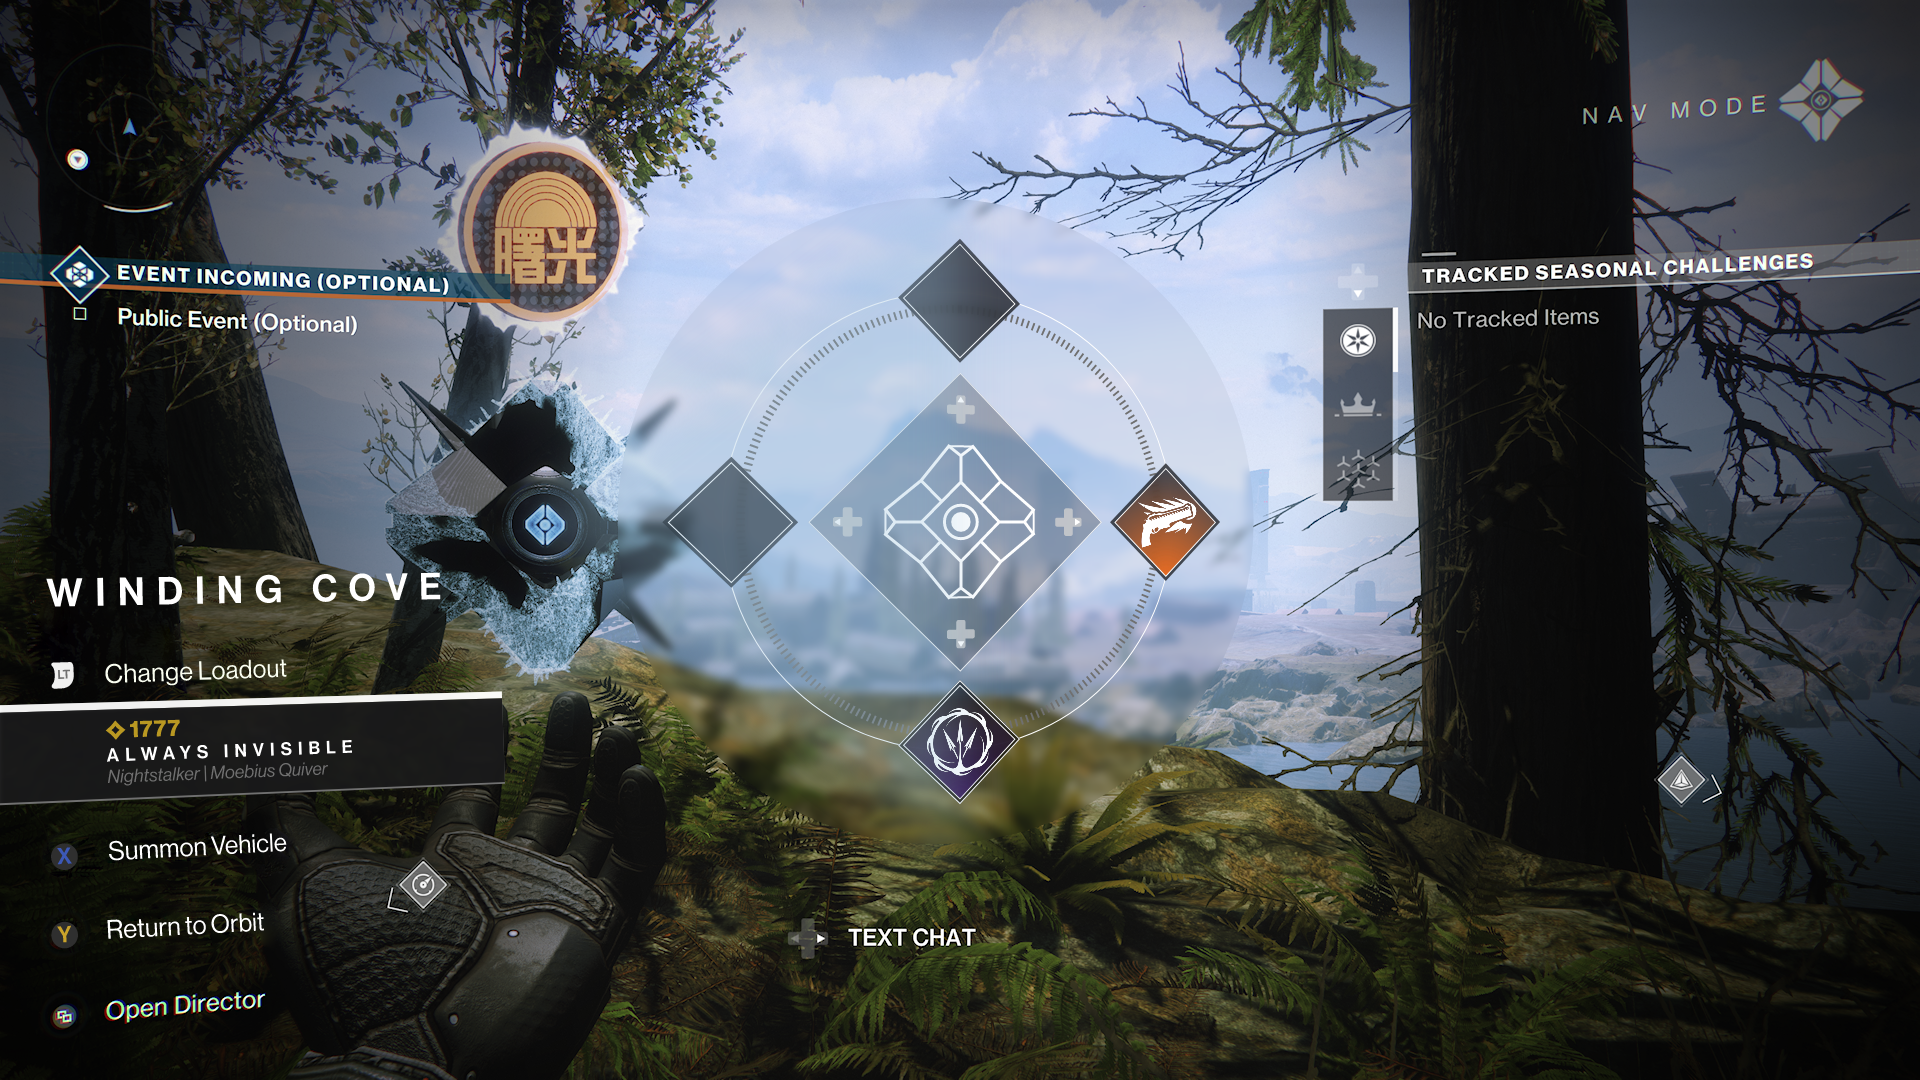
Access to the G/Pack from Nav mode
Now that we have an understanding of how a player can create and save a loadout, how does the Ghost come into play? I talked about the four swappable slots and how these four slots are mapped to the directional pad on the controller. This comes into play when a player wants to go from one game mode of Destiny to a different game mode without interrupting the flow of the game. With the G/Pack added to the “Nav Mode”, players would have access to four of their favorite loadouts using the key binds of the left trigger + whichever direction the player chooses.

Customize
Our player has now added an additional, PVE-focused loadout to the G/Pack.
Navigating into the G/Pack, we can see that the player has two saved loadouts, both mapped to the directional pad. These two loadouts would appear on the character screen because they have been slotted into the G/pack from this menu.

Exiting the character screen, the player is now “in-game” and can access the Ghost Nav menu. In this view, the player can see the two setup loadouts mapped to the directional wheel provided in the G/Pack menu. The player can now choose to swap to the other loadout, or keep it as is. Either way, the G/Pack makes the change easy for the player to do on the fly! Thanks, Ghost!
For the original experience, read it on Medium!